

Welcome to the Smart Map In Python Tutorial Series. In the previous tutorial we were installing some essential tools for python development, and we installed python3-venv, which allowed us to create our virtual environment.
We then created a project folder for our tutorials on our desktop, and within our desktop we created our virtual environment. And within our virtual environment we installed django-toolbelt which is Python Django bundled with some essential external dependencies that will help us in our Django development.
In this tutorial we will be downloading and installing the IDE that we will be developing our application in. The IDE that we will be installing is called ATOM. After installing ATOM we will download some external packages that we will need for developing our application.
If you want to check out the video, click on the link below. Remember to Like and Subscribe and hit the Notification button to make sure you're aware of the latest video we will publish.
Smart Map in Python Tutorials - Installing and Configuring Atom IDE - Part 1 (Video)
Smart Map in Python Tutorials - Installing and Configuring Atom IDE - Part 2 (Video)
 |
| Bubble plot on open street map |
Step 1: Open your internet browser and search for atom

Step 2: Click on the atom.io link to open the atom website and download the .deb package for your Ubuntu distribution

Step 3: When the Save File dialog pops up, save the file to your Downloads folder

Step 4: Locate the file in your Downloads folder, and double click it to open it in the Ubuntu Software Center

Step 5: In Ubuntu Software Center install the atom IDE

Step 6: Once the atom IDE has been installed, open it from the Ubuntu menu

Step 7: Once the IDE is open, open the package installer

Step 8: Search for python packages

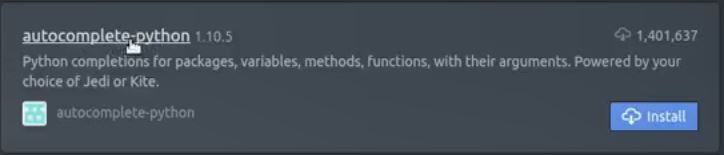
Step 9: Install the autocomplete-python package
Step 10: Search for the term3 package

Step 11: Install the term3 package

(Optional) Step 12 : Search for the activate-power-mode package

(Optional) Step 13: Install the activate-power-mode package

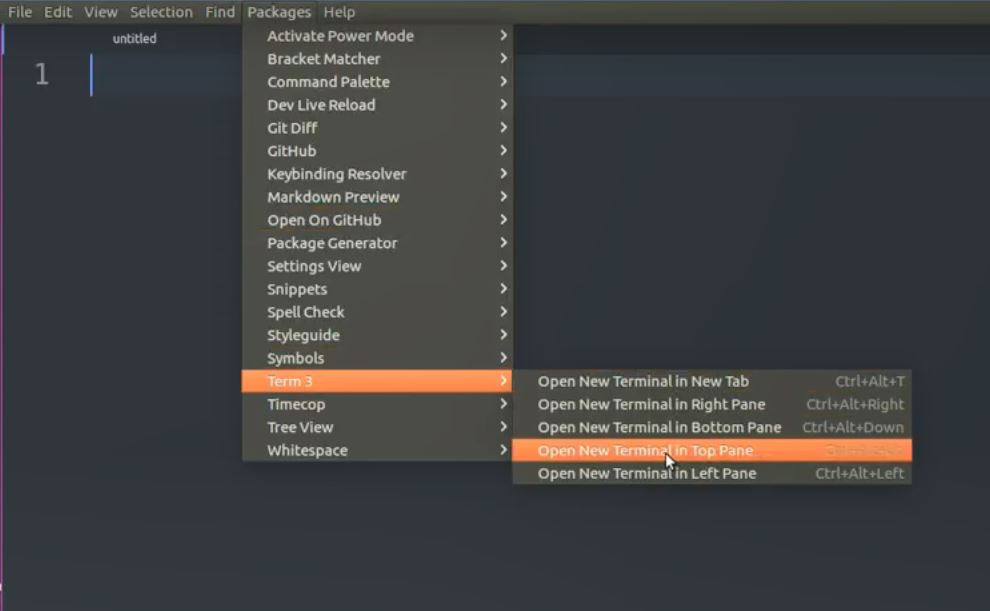
Step 14: Under Packages, open the Term3 terminal in the bottom section of the IDE
Step 15: Verify that the terminal is functional

Conclusion
That is about all we need to cover for installing and configuring Atom IDE. I hope you will enjoyed it and it will add some value to the projects you are currently busy with.
Stay tuned for the next tutorial in the Smart Map in Python Tutorial Series where we will be creating a GeoDjango application skeleton.


